Not every meal needs to be extravagant. Sometimes, you're feeling lazy. Other times, you simply don't have many ingredients on hand. Maybe you're at a friend's house and their kitchen is ill equipped to suit your culinary needs. That's why, when occurrences such as these happen, it's good to have a go-to plan for cooking. For me, it's stir fry.
One day, my brother brought home some shabu shabu telling me he thought I could do something with it. Insulted, I immediately opened up the package and threw it in his face. Just kidding. I thanked him humbly and scoured the Internet for ideas.
For those of you not in the know, shabu shabu is very thinly sliced beef typically used in Japanese hot pot. I've only had hot pot in China, having never been to Japan. (One day, though!) I enjoyed shabu shabu there, and also in my own kitchen when I've made hot pot myself. However, I was far too lazy to make hot pot, and it was just my brother and I eating. Since I couldn't find any other recipes for it online, I settled on just stir frying it. I was well pleased with the results. Interested in how it turned out? Well then, read on, friend!
Start off by getting your rice going. As usual, this is the part that will take the longest. So for maximum efficiency, start it first! Then, assemble your ingredients.
We're actually going to start off with the sauce, this time. Chop up your green onion and mince your garlic. With just a tiny bit of peanut oil, lightly saute. Before the green onions get too cooked, add in a drizzle of sesame oil, and generous amount of soy sauce. Also grate in some fresh ginger. Lightly simmer while stirring and then add in some chicken stock.
Continue to simmer and give it a taste. Now add in sugar until it reaches a nice level of sweetness. Keep the heat as low as you can once you're happy with the flavor. That way, it will stay warm while you do everything else for the meal. If the sauce looks familiar, that's because it's a pretty common Asian style sauce for which you can findmanyrecipesonline. There are many variations, and it can also be used cold. It's great for dunking egg rolls or pot stickers.
Now get your other stuff ready. Grab your mushrooms, wash them, and then take off the stems. If you want to get prissy, you can throw the stems away. Or, (for maximum efficiency) you can mince them up really fine. With the delicious caps, simply slice them. Then, dice an onion.
Add a tiny bit of peanut oil to a pan and heat it up. First thing to add into the pan should be the mushroom stems (if you're using them) and the white onion.
Get them sweatin'.
Now add some of that flavorful sauce you made earlier to the mix.
Establishing shot...
Scooping action...
Get ready for it...
Action shot! (This is difficult to do, so you had better be impressed.)
Now continue to saute until the onions have nice color and the liquid reduces down a bit. You can always add more if you need to. By the way, since the sauce is pretty salty you won't have to add any extra salt as you cook like you usually do.
When it cooks down a bit, you can go ahead and add the sliced shitakes.
Continue to stir fry and get them cooked. Get your shabu shabu ready to go. Once you add it in, you won't need to cook it for long.
Now, just before you add in the meat, you'll want to deglaze with a bit of mirin. It's like sake but really sweet. If any of that Asian sauce you've added is caramelizing and sticking to the pan, this will take care of it, and lend a great flavor both by what it gets off the bottom of the pan, and the mirin itself.
Also don't forget to be liberal with butter. Normally, this is the last step before you take it off the heat, but since the meat is so thinly sliced, it's better to to it now so you don't accidentally over cook it.
Now you're finally ready to add the shabu shabu! Here's where you gotta act fast. (It will be easier for you since you're not taking pictures while cooking.)
After just a minute or two it will look like this, and you know it's ready for eating.
To serve, put it over rice. Then drizzle more sauce on if you need.
I like to sprinkle some parsley on top. To finish it off.
And there you go! An easy and tasty meal that took little effort and even less creativity, yet still was way more interesting than throwing a frozen pizza in the oven.
No, don't worry, there is no raw chicken in this dish. I just like calling it simply "Chicken Sushi" because it invokes the mental image of eating raw chicken, which is funny. The chicken in this sushi is cooked, and it replaces what would normally be raw fish.
I love sushi. I could eat it every day, if it weren't so expensive. About a year and a half ago or so, I decided I wanted to try and make my own sushi. I was, however, intimidated by cutting up the raw fish. Ergo, I came up with this recipe. Now, I must add a disclaimer here: I made this dish long before I started this blog. I was less confident in the kitchen back then. Also, I didn't own a decent camera. I still don't, actually, but my current point and shoot at least can get the job done. I apologize in advance for any poor quality or blurry pictures.
Before we get started on this western style sushi, it would be beneficial to get a basic idea of how sushi is usually made. Besides making your sushi rice, it's also important to know the steps involved in creating a maki roll. Thankfully, my good friends, the husband and wife duo Jeff and Violetta, have shouldered the burden for me.
Here is a quick video hosted by Jeff and recorded by Vio that demonstrates how to make sushi. I encourage you to watch it in its entirety before moving on to the recipe proper.
On to the chicken sushi! Here's what you'll need in order to make it.
Chicken Breasts
Portobella Mushrooms
White Wine
Worcestershire Sauce
Bacon
Basil
Black Pepper
Lemon
Garlic
Orange Juice
Cumin
Cayenne Pepper
Italian Bread Crumbs
Eggs
Flour
Rice
Bacon
Green Onion
Dijon Mustard
Poppy Seeds
Rice
Rice Vinegar
Dried Seaweed
Pickled Ginger
Wasabi
Soy Sauce
Seems like a long list, I know, but many of these ingredients are things you probably already have, and several of them can be omitted or substituted per your preference. Indeed, the chicken alone is a recipe in and of itself. So! Let us start with that.
The basic idea behind the chicken portion of this dish is citrus flavored chicken that is tangy and juicy on the inside and crunchy and spicy on the outside. I first made chicken like this while experimenting with hot oil fondue many years ago. I've since adapted the chicken for use in many other dishes while keeping the premise basically the same. I've cooked it often enough that my long time friend and fellow home cook, Bari Khan, has not only made the recipe himself, but transformed it into a leaner, healthier, version. Please look forward to "Bari's Wet Chicken" which I plan on blogging about in the near future.
Before doing any prep at all, it's a good idea to get your rice started since it takes awhile. You'll cook the rice as normal in your rice maker and make it into sushi rice later. Remember to rinse your rice well, and don't try to use inferior rice. This is especially important for making what will eventually be sushi rice. Go with the good stuff.
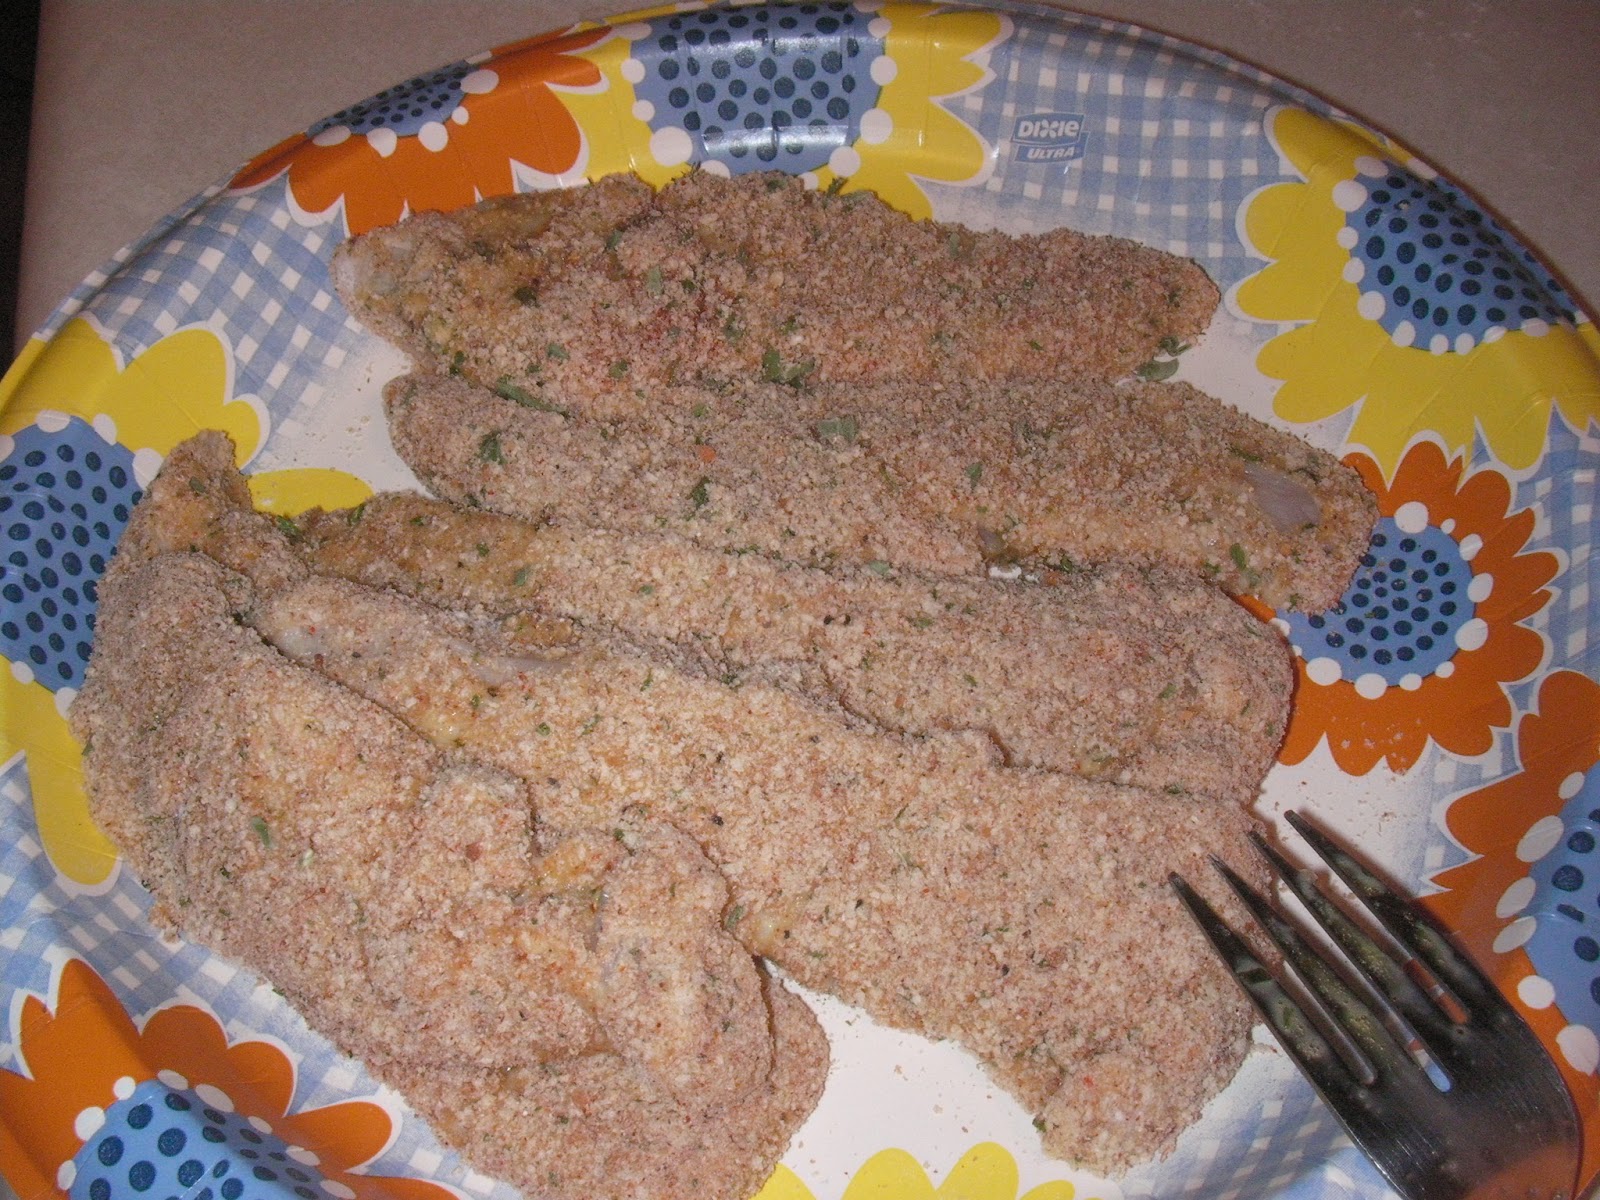
First take your chicken breasts and trim off any excess fat. Cut the breasts into moderately sized strips. Since you'll be breading and frying the chicken pieces it's important not to leave them too thick, or the middle won't be fully cooked by the time the breading is brown and crispy.
The next step is to make a marinade for the chicken. Combine into a bowl a large amount of orange juice, a bit of lemon juice, minced garlic, basil, and black pepper. Place the chicken into the marinade and leave it for at least a few hours. Even better if you're able to do this part the day before and let it marinate overnight.
It is now time to create the bread crumb mixture. Into another bowl combine the Italian bread crumbs, more basil, black pepper, cayenne pepper, and cumin. You can control the level of heat by how much cayenne pepper you add. You might be wondering why we're not using panko bread crumbs here. They would, after all, add a more authentic Japanese feel to the dish, wouldn't they? The answer is that we're trying to make an American style sushi. We're fusing Japanese and American (Italian) flavors here. However, as always, you can make changes as you go and modify the recipe to make it your own. If you want it to be more crunchy and more Japanese give it a try with panko crumbs instead.
Now set up your station with whisked eggs, flour, the bread crumb mixture, and your chicken. Get ready to get messy! The flour is especially important here because since the chicken has been sitting in a wet marinade, the egg and then bread crumbs won't adhere well unless you first use the flour. So the method goes, flour, egg, bread crumbs, done.
Here's what the chicken will look like when it's prepared and ready to go into the pan. However, set it aside for now while we get everything else ready.
First thing, the almighty bacon. I like my bacon like how I like my whiskey: with a black label on it.
Fry up the bacon as usual. Add some fresh ground black pepper and turn frequently as you go. This will net you crispy bacon that is nice and flat, an essential property for rolling into sushi properly. Set aside.
Next, break out the portobellas. Slice them up thinly and place into a mixture of white wine, soy sauce, and worcestershire sauce, then grind a little black pepper on top. If this mushroom preparation looks familiar, it's because I used the same technique for my shrooms with pulled pork. Please see my earlier blog entry for details!
The last item you'll need to get ready for the sushi roll is the green onion, but for this, simply wash them off and leave them raw.
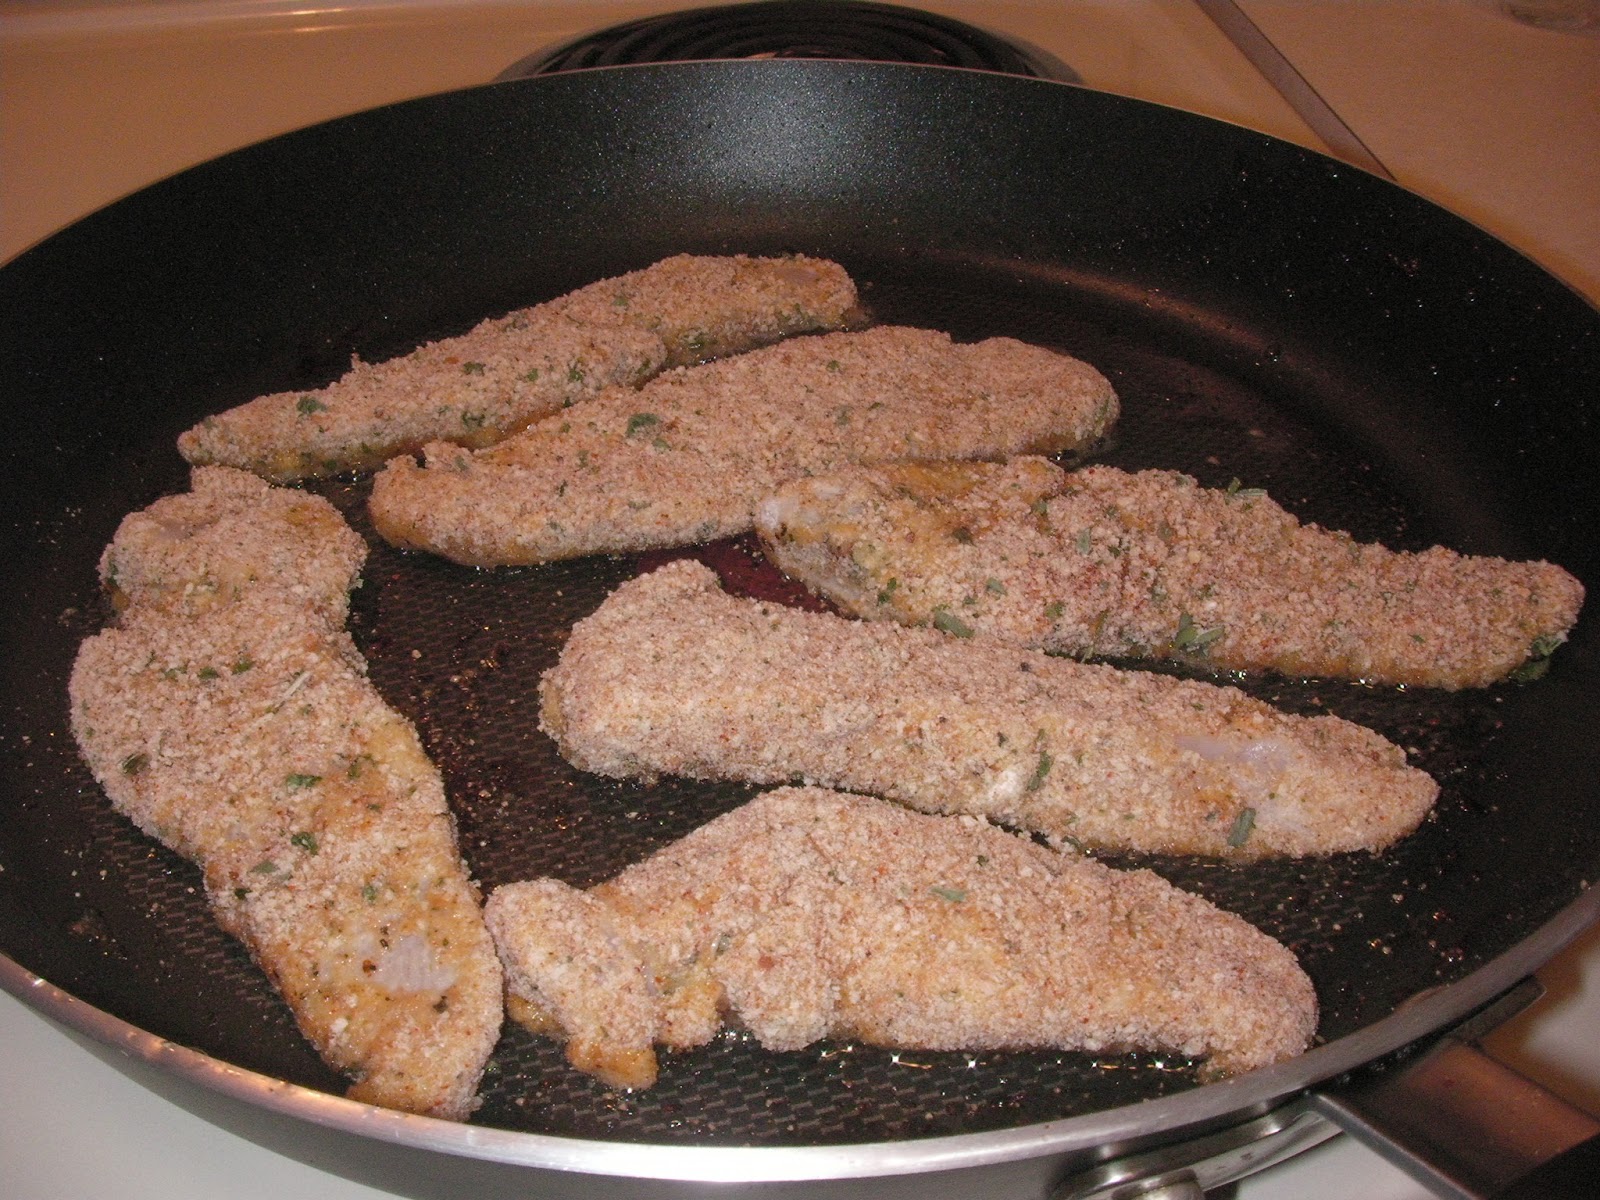
Now everything is ready except for the chicken, so let's return to that. Place the breaded pieces into hot oil that's been lightly salted. Please don't use extra virgin olive oil for this. Any other oil is a better choice. If you must use olive oil, go with a light one.
This is one of those times that flipping too much can get you into trouble. I love flipping food while it's frying, but you gotta control those impulses to flip. It's better to just let the chicken sit on one side until it's done in this case. That way, the chicken will get hot enough to cook thoroughly. If you keep flipping the chicken, the breadcrumbs will be burnt before you get the chicken cooked all the way through. After a few minutes you'll get a beautiful golden-brown color and then you'll know they're ready to flip.
Now do the same for the other side and place them onto a plate.
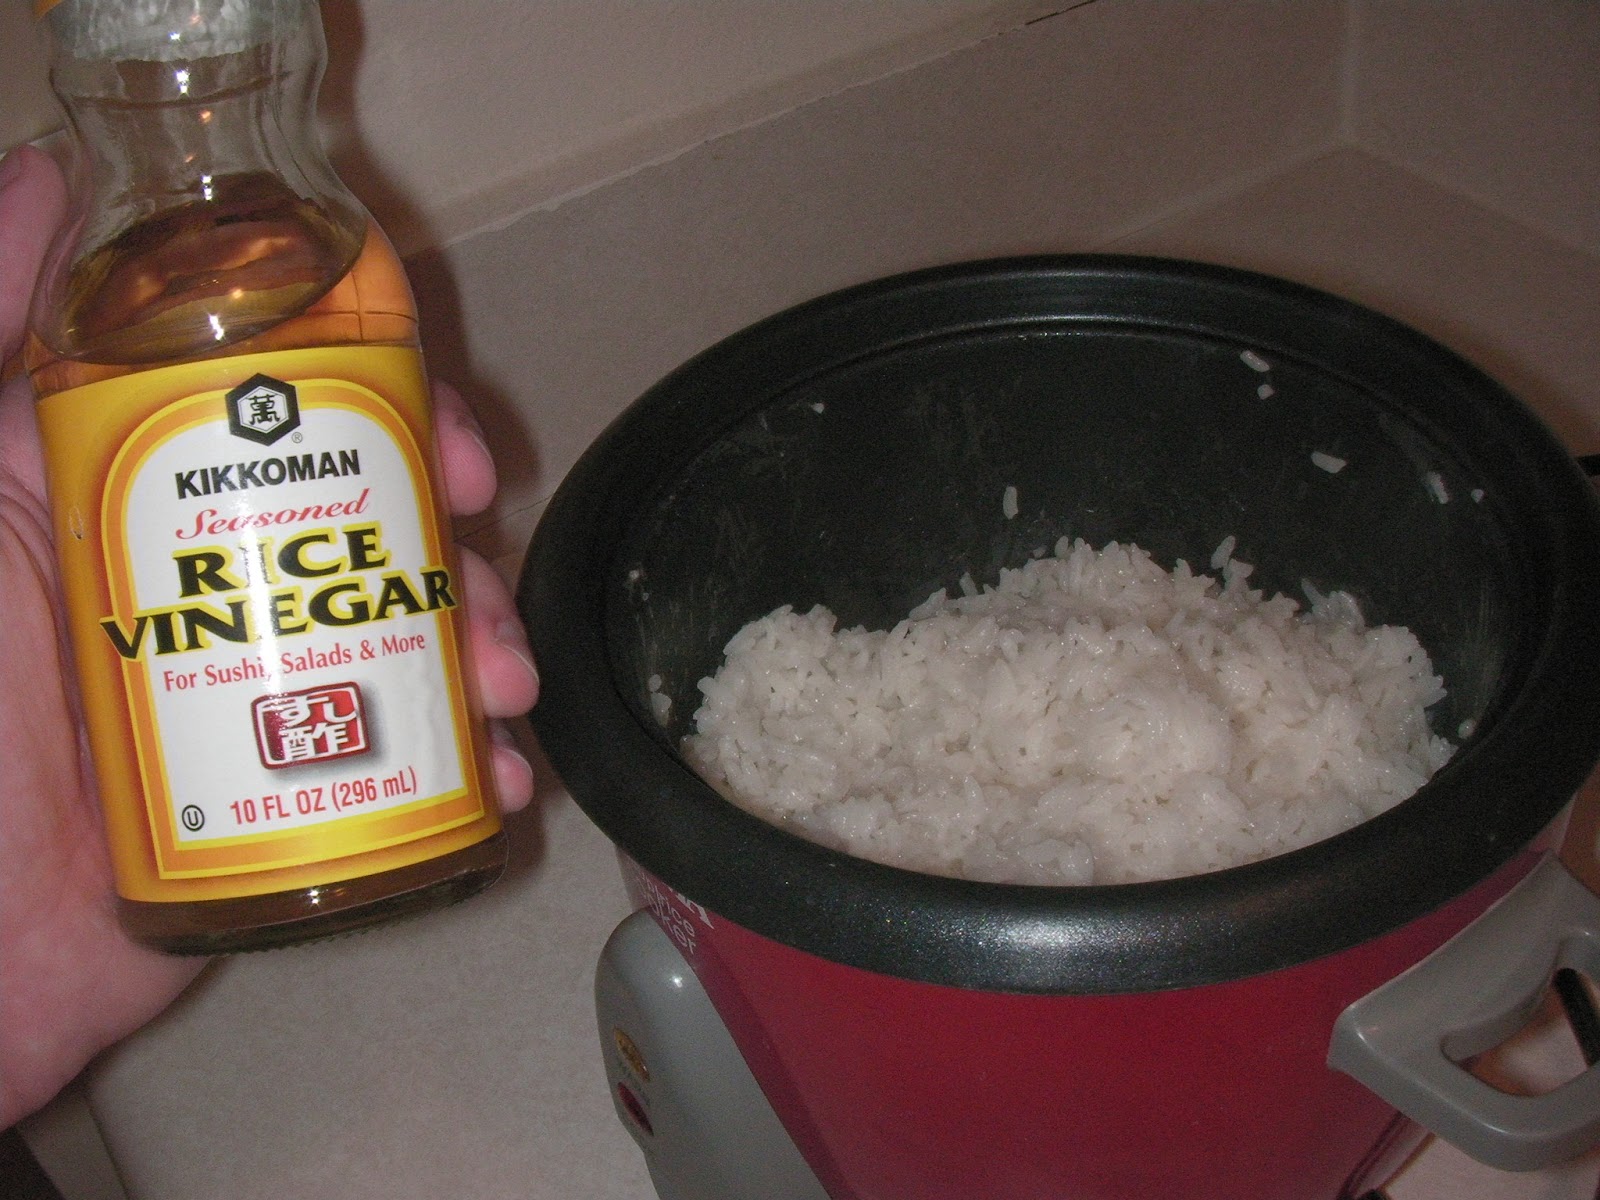
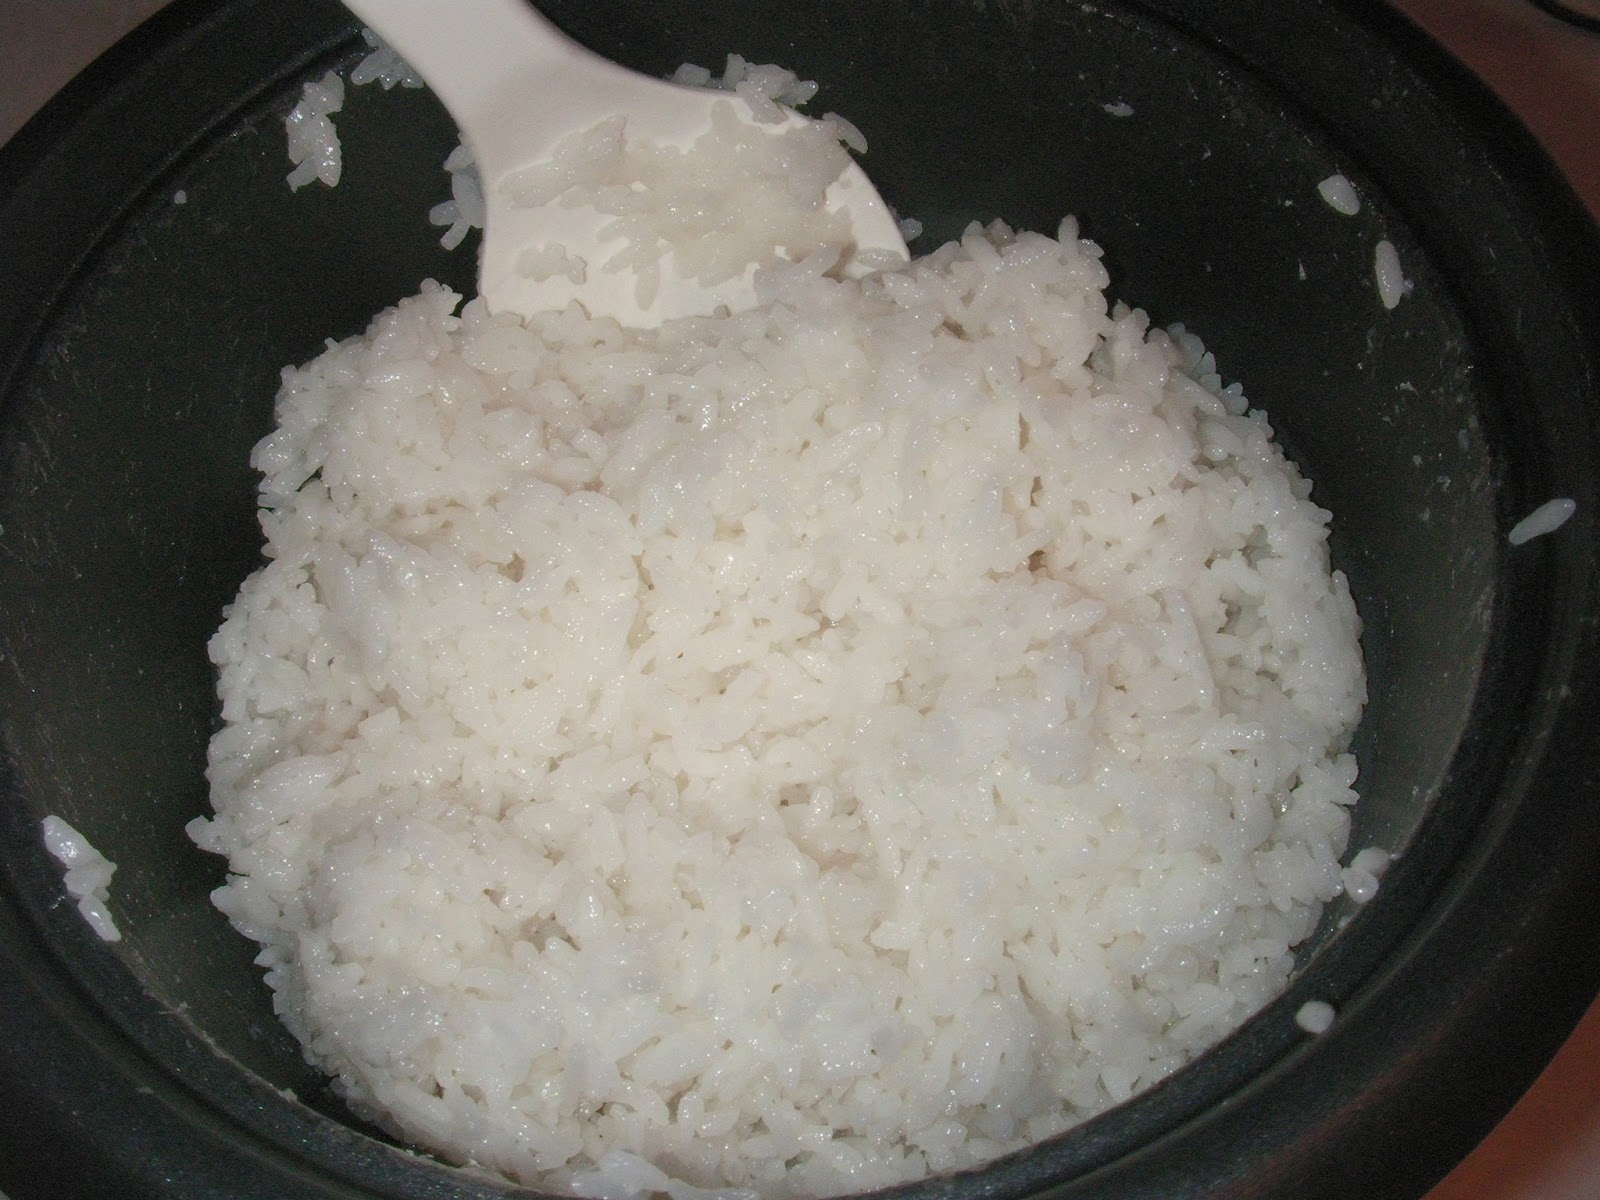
Finally you'll need to prepare your sushi rice. To do so, you take your cooked rice and add in seasoned rice vinegar while mixing and fanning. It's best to do this in a large wooden bowl and not the rice maker itself since it will still be warm from cooking the rice. Sadly, I learned this lesson the hard way. For the vinegar, you can simply buy it at the store, or you can prepare it yourself. All it entails is simmering vinegar and adding in salt and sugar. For this dish, I used store bought vinegar, but since then I have made my own and it improved the quality of the sushi rice, so I do recommend you do that.
Everything is now ready! Let's roll! Roll up our sushi that is. You'll need a bamboo mat that is used for the rolling process. These can easily be found in most Asian markets, sometimes found in regular grocery stores, and always available on the Internet. They're cheap, so don't worry.
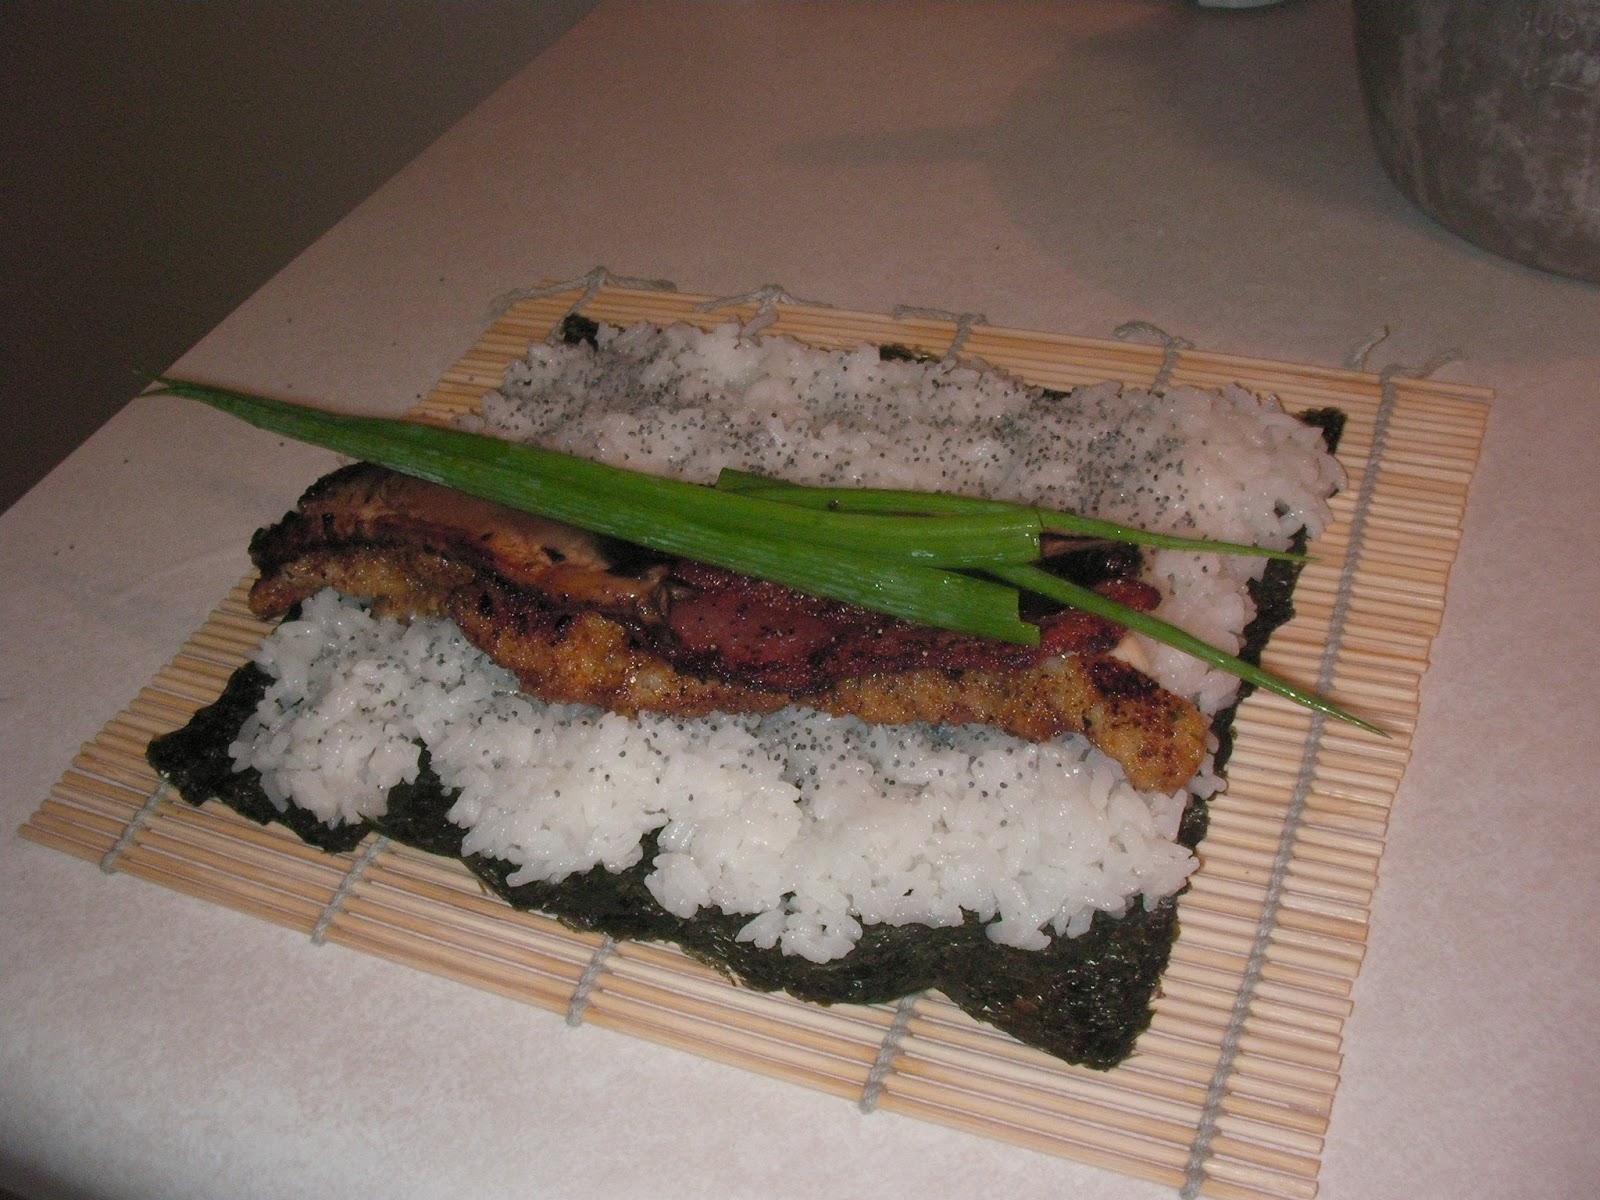
First place down your dried seaweed. Once again, you'll have no trouble finding this stuff at any Asian market. However, most American grocery stores have an Asian section where you can usually find the seaweed.
Next, take your prepared sushi rice and spread it evenly onto the seaweed. Make sure to wet your hands first before working with the sticky sushi rice. There's kind of an art to spreading the rice around. I'm by no means an expert. Indeed, my final result was far from perfect. I think after practicing a few times it becomes much easier.
Now sprinkle on the poppy seeds. This is totally optional, but I like them. They are especially nice for presentation if you choose to make the sushi rolls inside out, meaning the rice on the outside and the seaweed on the inside. This is very common in westernized sushi, but harder to pull off. Simply flip the seaweed and rice over, and add the ingredients onto the seaweed side before rolling to accomplish this. However, I think we should first try the traditional way because it's easier.
Now spread a thin line of dijon mustard onto the rice. Don't do it exactly in the middle, but more towards one side. This will make rolling the whole thing up significantly easier when the time comes.
Place the chicken into the roll. You may have to slice it lengthwise in order to fit it nicely.
Now add the crispy bacon.
Next, place the sauteed potobella mushrooms on top.
Garnish with the green onion. You could omit these or even cook them if you don't like raw onion. Notice the placement here. If you leave them long enough to go "out of bounds" of the roll, you'll wind up with a cool look for the final presentation.
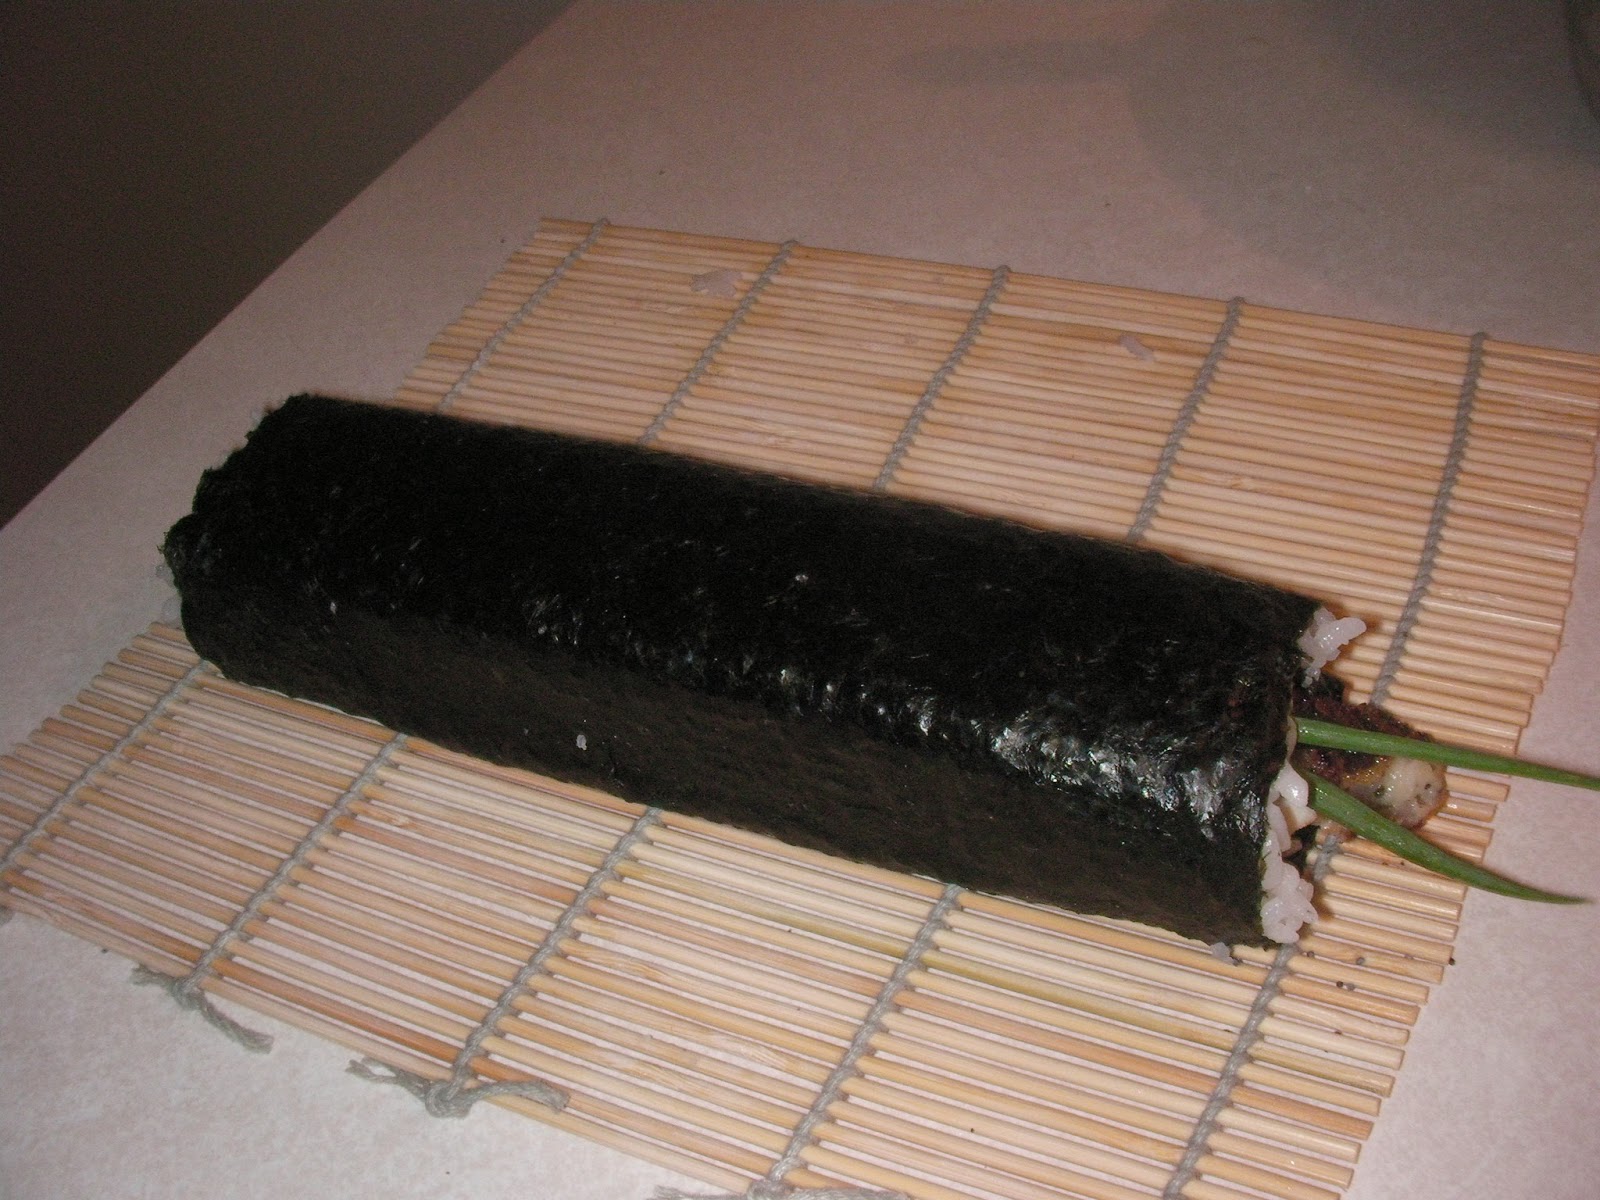
Now carefully roll it up. This is another skill that takes some practice to get right. As mentioned, it is quite a bit easier with the seaweed on the outside. It may not turn out perfect on your first try. If this happens, quickly eat the evidence and try, try again!
Unlike in Jeff and Vio's video, the typical way to cut maki is to create six pieces. Just cut the whole thing in half, and then cut each half into three equal sized sections.
When plating, place the end pieces on their faces so the extra green onion sticks out. Serve with soy sauce, wasabi, and pickled ginger.
And you're done! Now, with bolstered confidence how about we give the inside-out western roll a try?
Just add the ingredients to the opposite side of the rice/seasweed...
And roll 'er up!
Ugh. It kinda fell apart. Ah well, I'll do better next time! It still tasted good, at least.
So now you can make chicken sushi. I actually now live close to a place that not only serves sushi with cooked ingredients, but has a section of their menu devoted entirely to it! They also have a page of sushi rolls that include bacon. It's pretty great. Try mixing different things and rolling them up like sushi, you never know what will end up working out well.